
- 기존 홈페이지 html, php,… 복사( tar.gz )
- wordpress database 복사( wp_ xxx tables insert dml backup )
- 이동할 서버에 wordpress, database, web server 설치
- 이동할 서버로 기존 홈페이지 파일( tar.gz) 이동시키고 압축해제( /var/www/이하)
- web server 에 도메인 설정 추가. ( 도메인별 web page root 설정 )
- web server 재시작
- wordpress 접속 -> 기본 설정 진행
- database 복사( wp_userxxx 제외 )
Github 가입, 저장소 등록
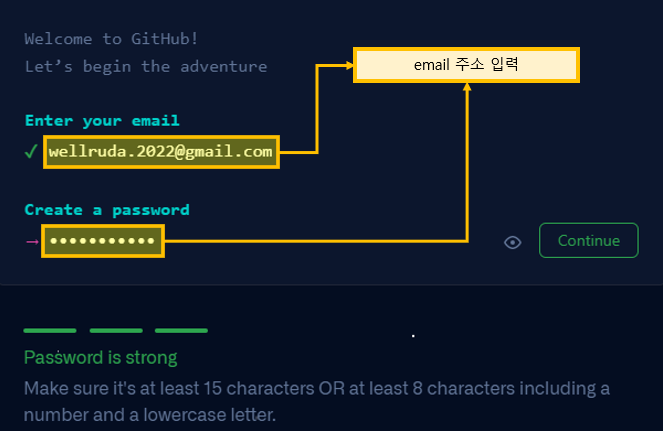
1.Github 접속, 가입
– 접속 URL : https://github.com/

2. 가입 절차
gantt-chart
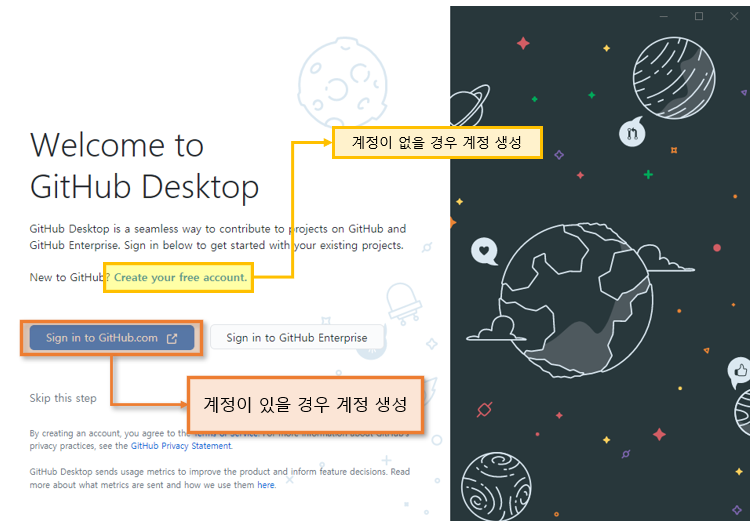
Github Desktop 설치
- Download
– url : https://desktop.github.com/
– exe version - exe version 실행
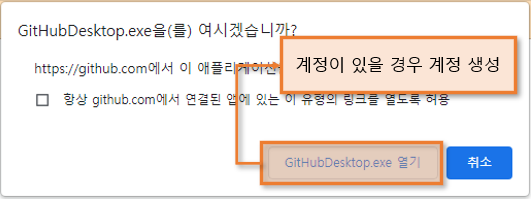
– Github sign in.
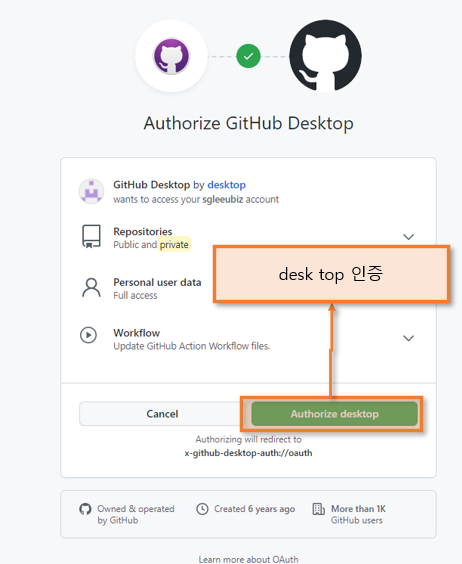
3. client 인증
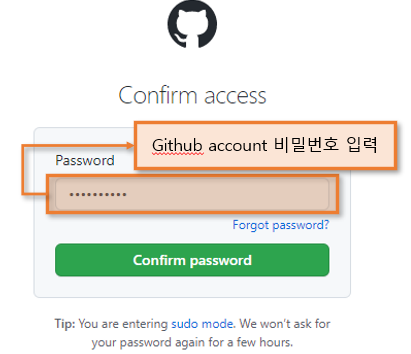
4. Github 접속 : password 입력
5. Desktop app 설정.
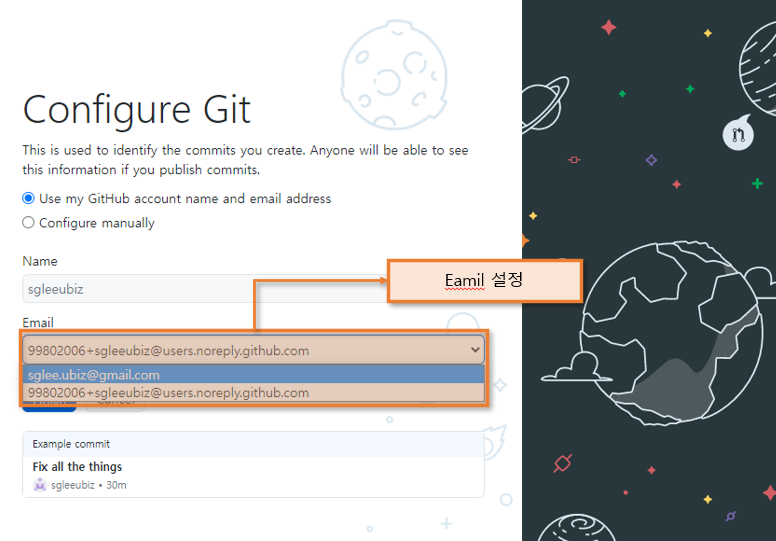
6.Git 설정.
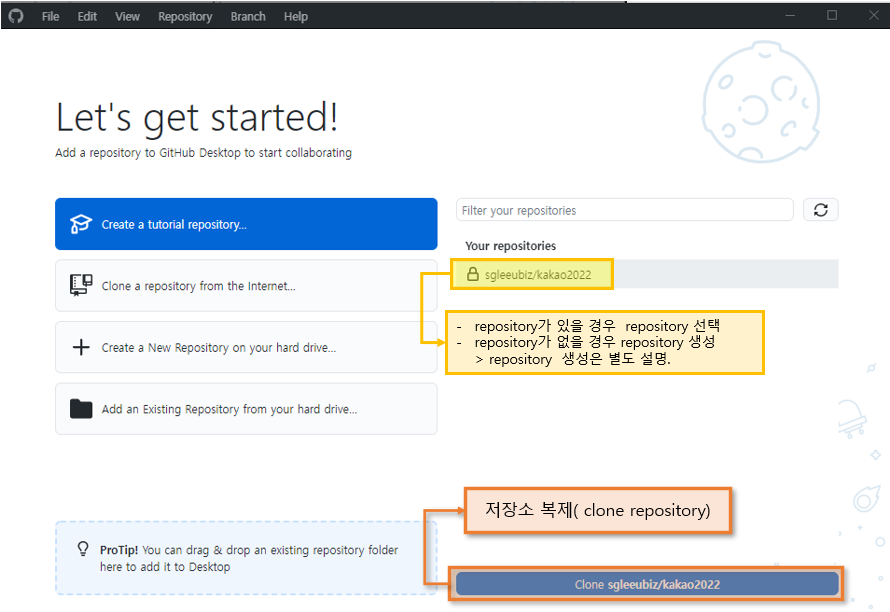
7. 저장소 복제( clone repository )
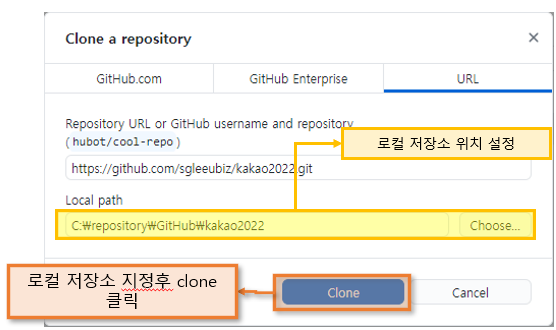
8.로컬 저장소 지정
9.저장소 확인
프로젝트 폴더 구성
00.프로젝트관리
01.산출물
02.준비
03.분석
04.설계
05.구현
06.테스트
07.완료
08.안정화
A0.참고
B0.임시
B1.미분류
개발 표준 가이드 문서
frontend, backend
JENKINS 설치, 기본 설정 – CentOS
[설치환경]
– OS : CentOS 7.9
– 호스팅 : cafe24, 가상 호스팅
– jenkins 2.319.2-1.1
[download]
– https://jenkins.io/download/
[설치]
To use this repository, run the following command:
sudo wget -O /etc/yum.repos.d/jenkins.repo https://pkg.jenkins.io/redhat-stable/jenkins.repo
sudo rpm --import https://pkg.jenkins.io/redhat-stable/jenkins.io.key
Install Jenkins
sudo yum install jenkins
[port 변경 및 방화벽 해제]
– 기본 8080 port로 설정된 것을 변경.
> sudo vi /etc/sysconfig/jenkins
>> /*HTTP_PORT=8080*/ HTTP_PORT=18080
[jenkins 시작]
sudo systemctl start jenkins
[jenkins version update]
1. jenkins service 중단.
sudo service jenkins stop
2. jenkins update
sudo yum update jenkins -y
3. jenkins 시작
sudo service jenkins start
** jenkins 실행 실패시
> java version이 맞지 않아서 발생.( 2023.06.16 : jenkins 정책에 의해 jdk 버전을 11로 변경했음 ). openJDK 11 설치 -> update-alternatives –config java로 java 버전 선택 -> 젠킨스 실행( systemctl start jenkins ). -> 프로젝트 jdk버전과 맞지 않아 jenkins에서 프로젝트 빌드 실패시 update-alternatives –config java를 통해 프로젝트 java버전에 맞게 변경하면 됨.
[참조]
– https://pkg.jenkins.io/redhat-stable/
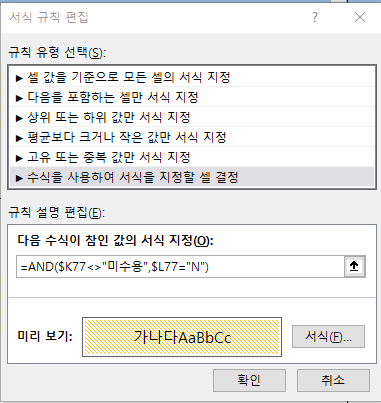
excel 수식 지정
- 범위, 다중 조건.
nexacro 단축키
alt + g : function의 구현부로 이동.

ctlr + t : tab order 설정.
eclipse 단축키
shift + alt + a : toggle editor block

shift + ctrl + o : import resources.

shift + ctrl + g : 특정 method가 사용된 resource 찾기.

sfhit + alt + j : 특정 method / class 의 자동 주석.

shift + ctrl + r : resource 찾기
shift + ctrl + t : type 찾기.
shift + ctrl + h : hierarchy type 찾기