- registry 편집
- 윈도우키+R => regedit
- HKEY_CLASSES_ROOT > Excel.Sheet.12 > shell > Open > ddeexec : 삭제
- HKEY_CLASSES_ROOT > Excel.Sheet.12 > shell > Open > command : command 항목 삭제
- HKEY_CLASSES_ROOT > Excel.Sheet.12 > shell > Open > command : 기본항목 수정
> “C:\Program Files (x86)\Microsoft Office 2010\Office14\EXCEL.EXE”/en “%1”
> argument만 수정 : /dde -> 삭제, /en “%1” 추가
mariadb 설치-ubuntu 16.04 LTS
- 설치 환경
- OS : 우분투 데스크탑( 16.04 LTS)
- 설치 순서
- apt 목록 확인
- apt list mariadb-server -a
- 설치
- sudo apt install mariadb-server
- 설치 확인
- sudo mysql
- apt 목록 확인
tomcat manager 403
OS : utuntu 16.04 LTS
tomcat 8.5.24
설치후 manager 접속시 403 오류 날경우,
{tomcat 설치경로}/webapps/manager/META-INF/context.xml 편집
아래 부분 주석
<Valve className=”org.apache.catalina.valves.RemoteAddrValve”
allow=”127\.\d+\.\d+\.\d+|::1|0:0:0:0:0:0:0:1|119.205.221.44″ />
==>
<!– <Valve className=”org.apache.catalina.valves.RemoteAddrValve”
allow=”127\.\d+\.\d+\.\d+|::1|0:0:0:0:0:0:0:1|119.205.221.44″ />
–>
Git 서버 설치 및 설정( ubuntu, sts 연동)
[설치환경]
– OS : Ubuntu 16.04.2 LTS
– 호스팅 : cafe24, 가상 호스팅
– Spring Tool Suite 3.9.0
[Git 설치]
– 순서
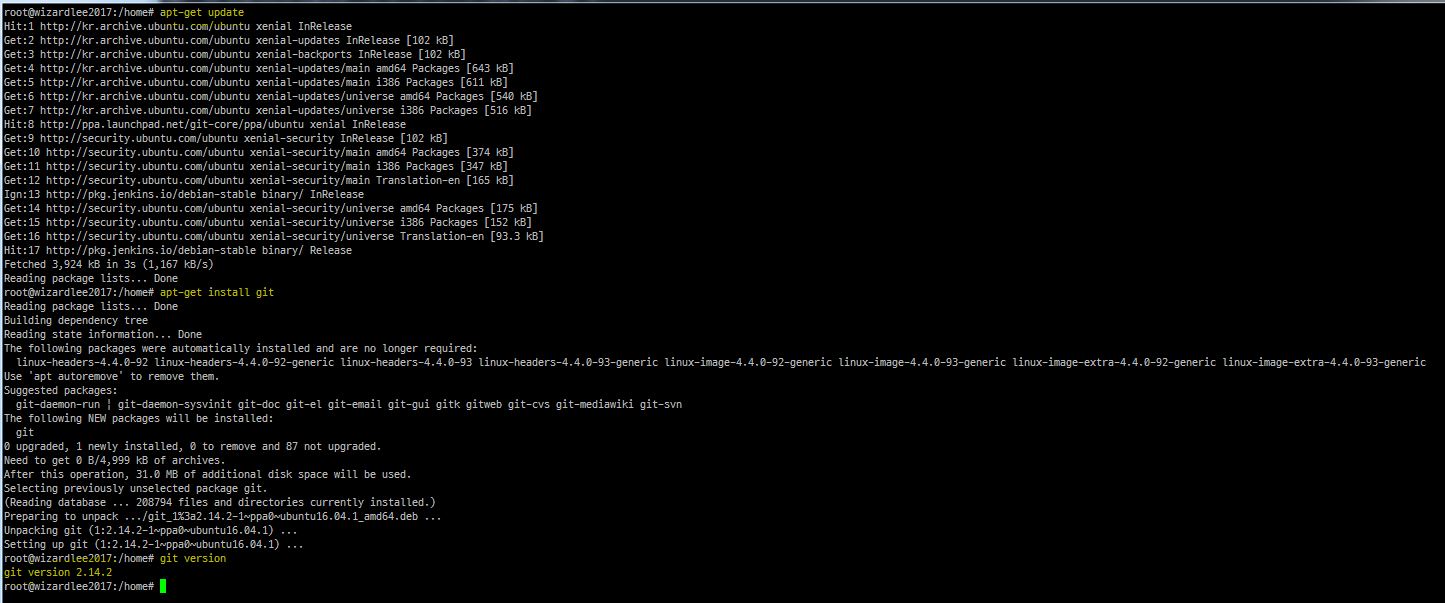
1. apt-get update
2. apt-get install git
– 설치 확인 : git version
[계정 생성]
– adduser git
> password 입력, 기본정보 모두 입력 않해도 무관.

[key 생성]
– su – git
– cd ~
– ssh-keygen -t rsa
[bare repository 생성]
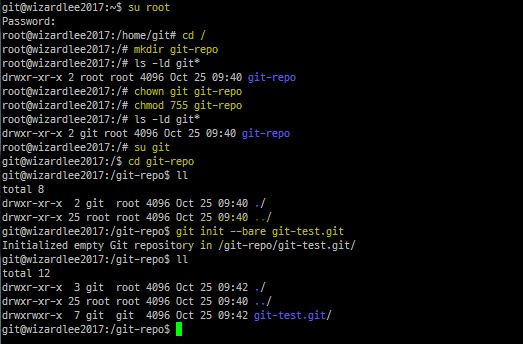
– repository로 사용할 directory 생성.
> su root
> mkdir <git repository directory name>
> chown git <git repository directory name>
> chmod 755 <git repository directory name>
> su git
> cd <git repository directory name>
> git init –bare <project name>.git
[git user 생성]
– git config –global user.name “<user name>”
– git config –global user.email “<email>”

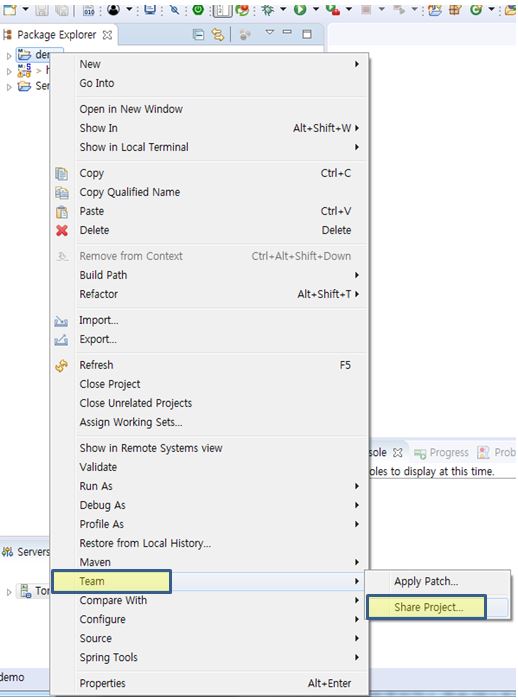
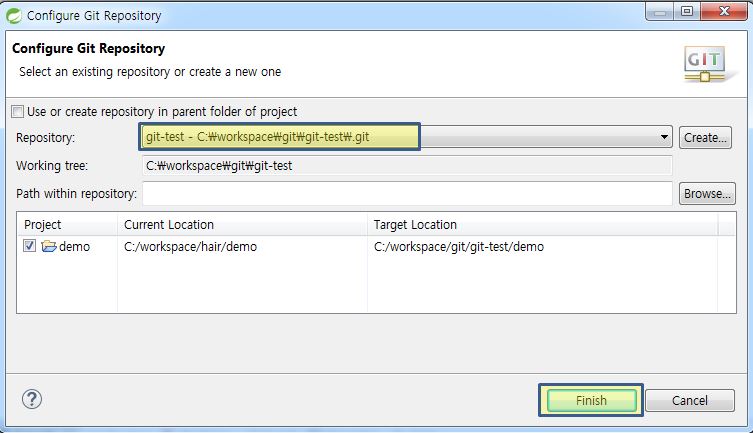
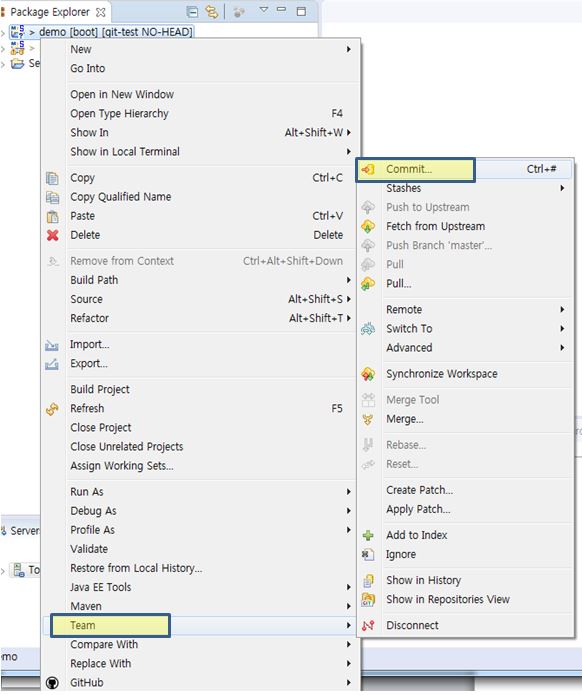
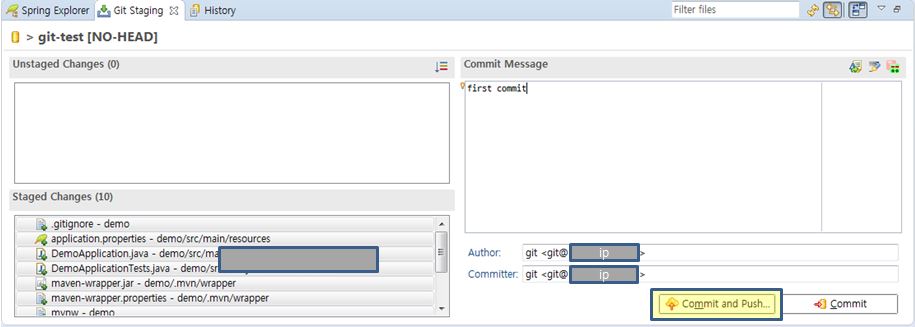
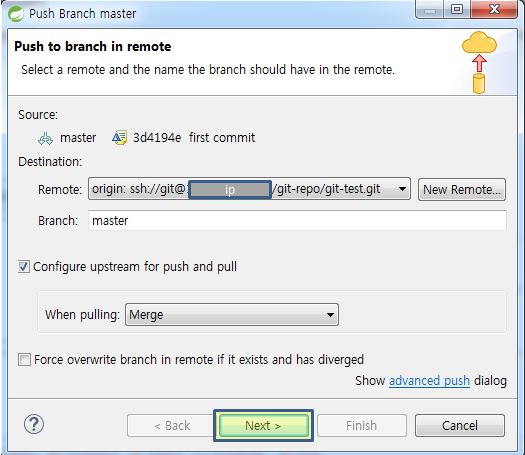
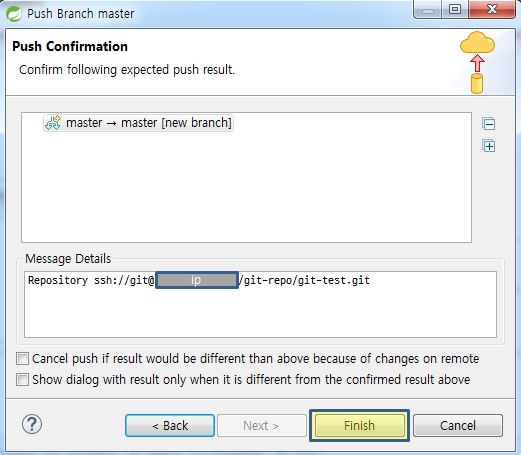
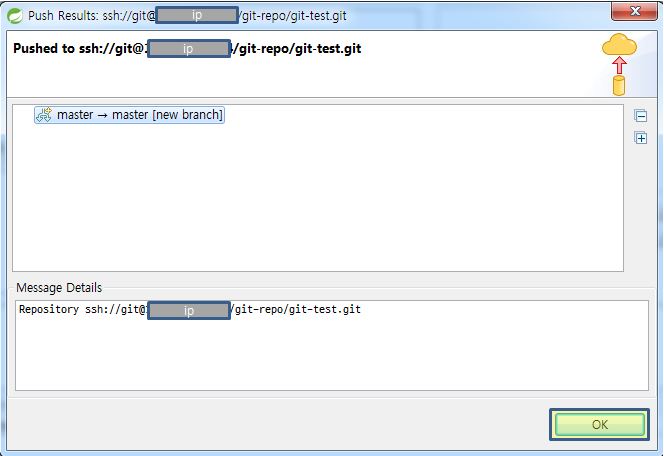
[Spring Tool Suite 연결]
– git repository 추가.
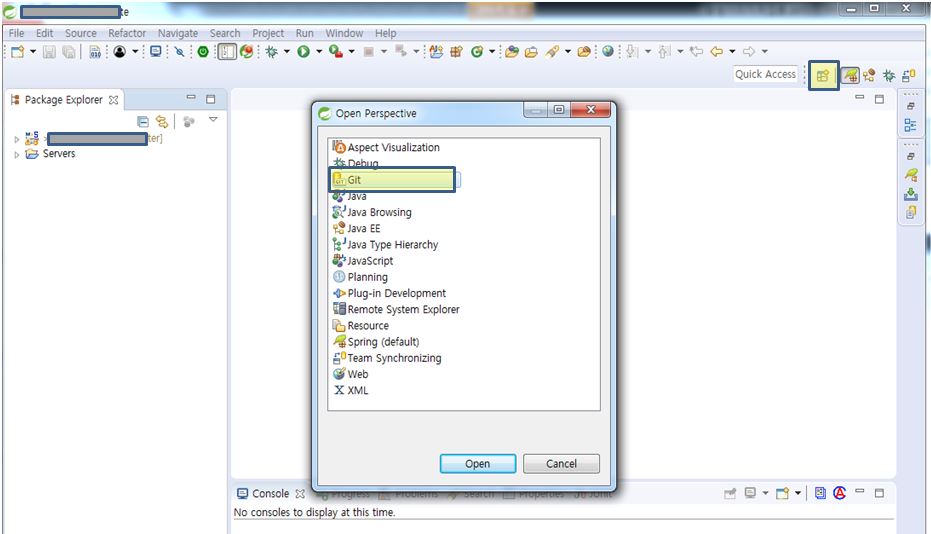
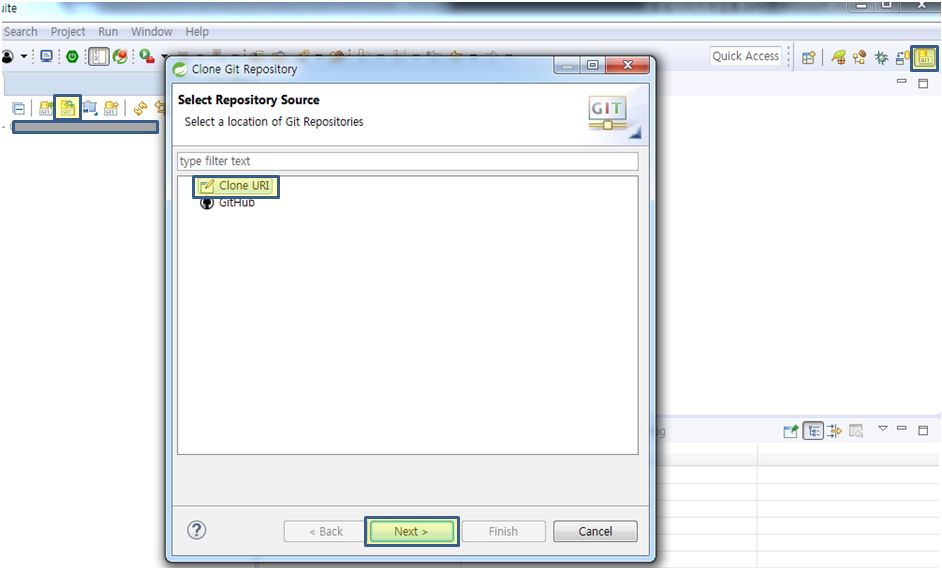
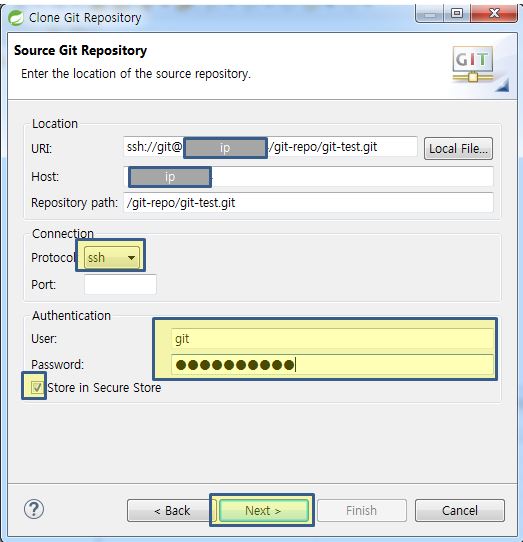
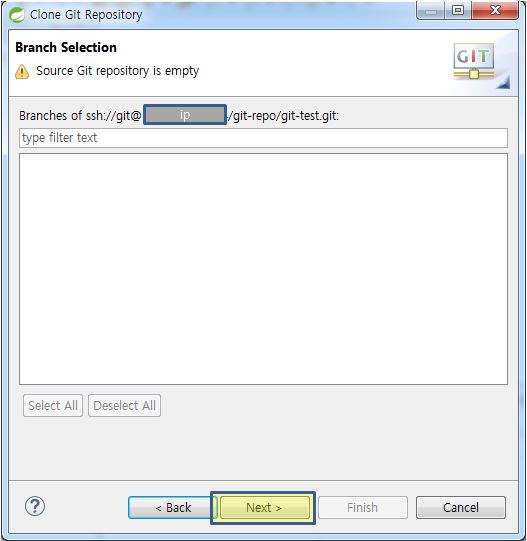
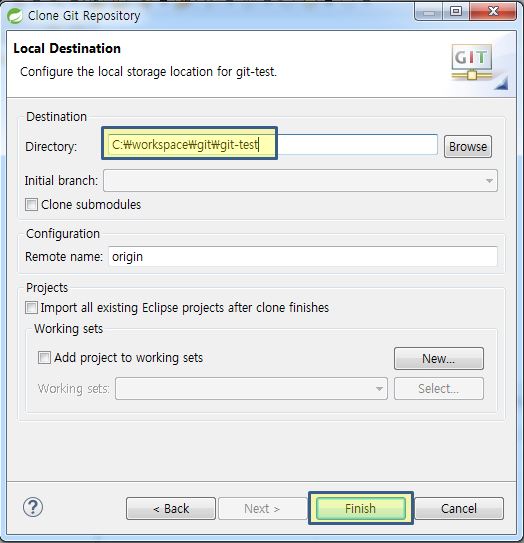
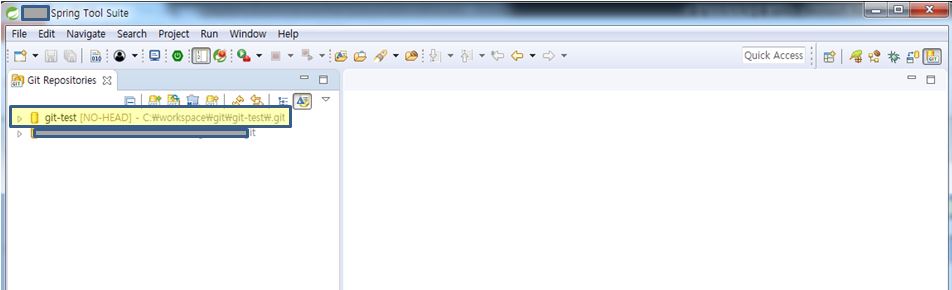
– project 연결
[ssh 접속 – 선택 사항]
– local에 git이 설치가 되어 있어야 한다.
> git 설치 ( https://git-scm.com/downloads )
– command로 clone시 password 입력을 하지 않기 위해서는 공개키를 생성하여 git server에 등록 해주어야 한다.
> 다음 명령어로 원격저장소 접속 테스트를 수행한다.
>> git ls-remote -h <원격저장소 url> HEAD

– ssh key 생성.
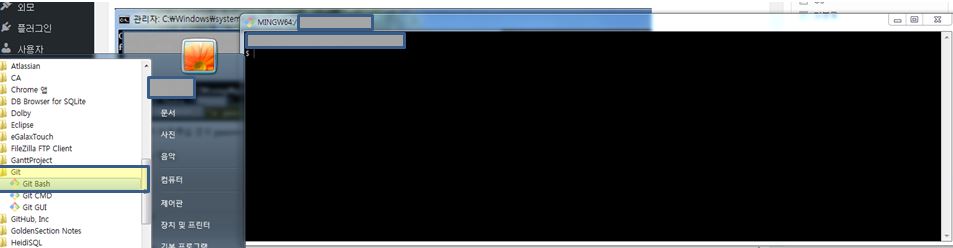
> git bash 실행
> ssh-keygen 실행
>>사용자/.ssh folder에 생성됨.( id_rsa, id_rsa.pub )
ssh key 생성1
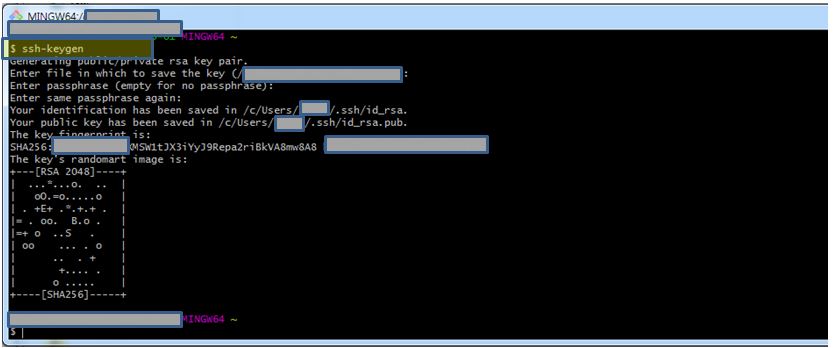
ssk key 생성2
– id_rsa.pub를 서버로 전송.( ※git user home directory의 .ssh directory로 이동시킨다.)
(/home/git/.ssh)
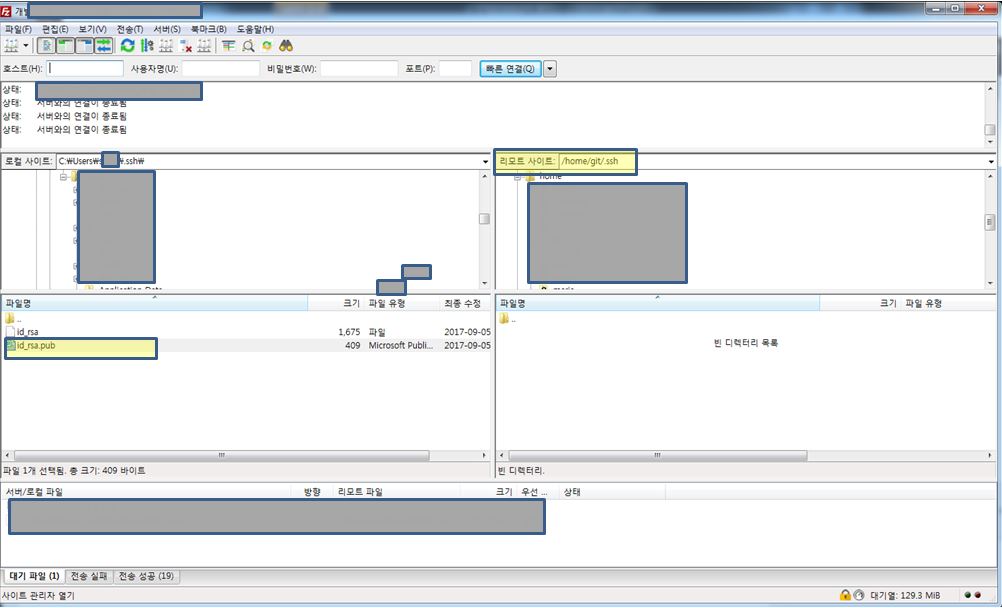
공개키(id_rsa.pub) file 전송
– authorized_key file 생성
> cd /home/git/.ssh
> cat id_rsa.pub >> authorized_keys
– authorized_key file 권한 변경
> su root
> chmod 700 authorized_keys ( 권한 변경을 해주지 않으면 password 입력 prompt가 발생 한다. )
– 확인

ubuntu boot partition 정리
package 설치시 용량 부족 메시지가 표시되면서 정상적으로 표시되지 않을 경우, boot partition을 정리해서 boot partition 여유 공간을 확보하면 정상적으로 설치가 가능하다.
boot partition 정리 방법1. 불필요한 package 삭제.
– dpkg -l linux-image-\* | grep ^ii
– apt-get purge <package>
e.g. apt-get purge linux-image-4.4.0-91-generic
jenkins 설치, 기본 설정 – 우분투
[설치환경]
– OS : Ubuntu 16.04.2 LTS
– 호스팅 : cafe24, 가상 호스팅
– jenkins 2.73.2
[download]
– https://jenkins.io/download/
[설치]
– package repository에 다음과 같은 명령으로 키 추가.
> wget -q -O – https://pkg.jenkins.io/debian-stable/jenkins.io.key | sudo apt-key add –
– /etc/apt/sources.list에 다음 목록 추가
> deb https://pkg.jenkins.io/debian-stable binary/
– package update, install jenkins
> sudo apt-get update
> sudo apt-get install jenkins
[port 변경 및 방화벽 해제]
– 기본 8080 port로 설정된 것을 변경.
> sudo vi /etc/default/jenkins
>> /*HTTP_PORT=8080*/ HTTP_PORT=8090
[참조]
– https://pkg.jenkins.io/debian-stable/
[설치 과정]
– 이후 추가 –
[설치 후 기본 설정]
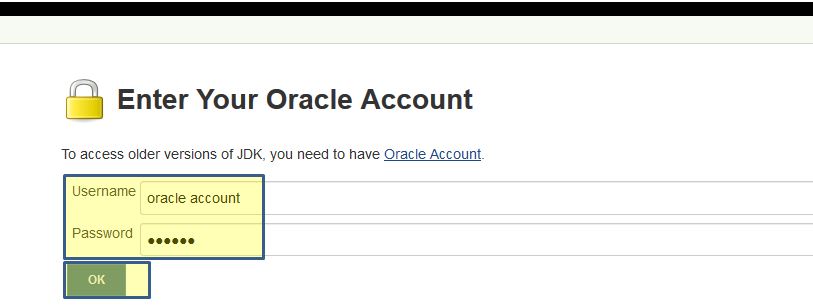
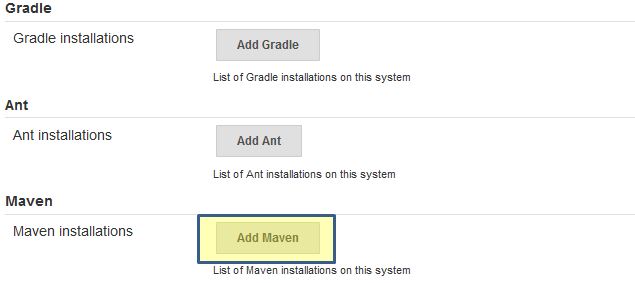
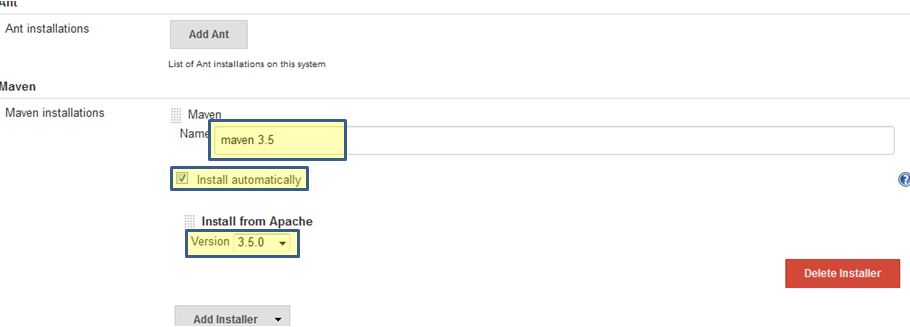
– Global Tool Configuration 설정
> JDK 설치
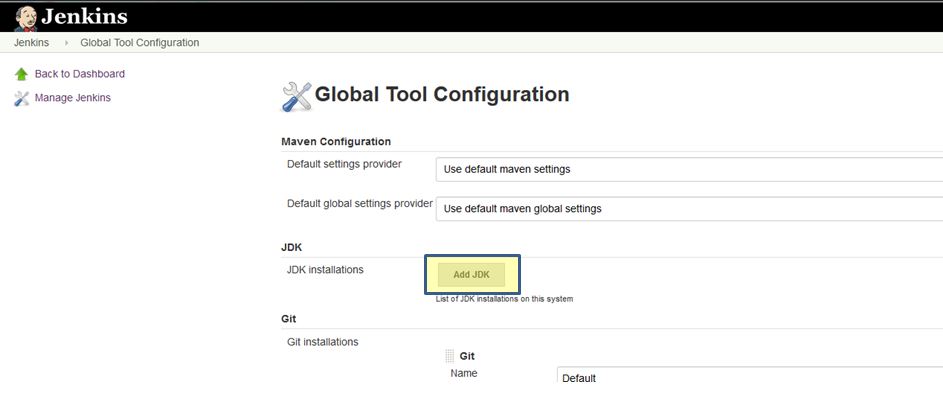
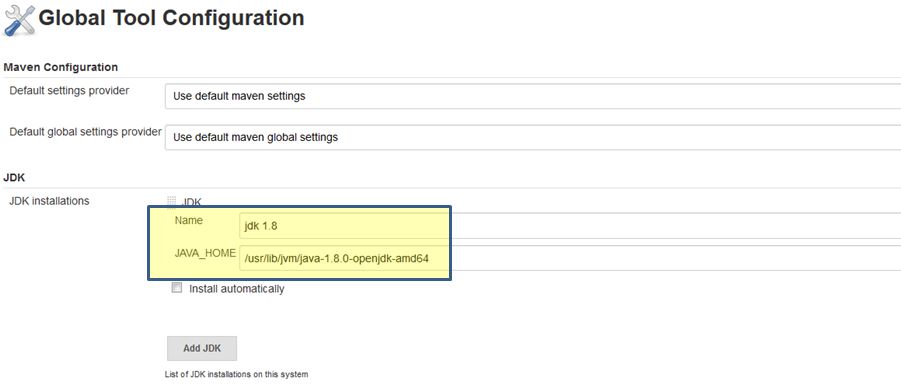
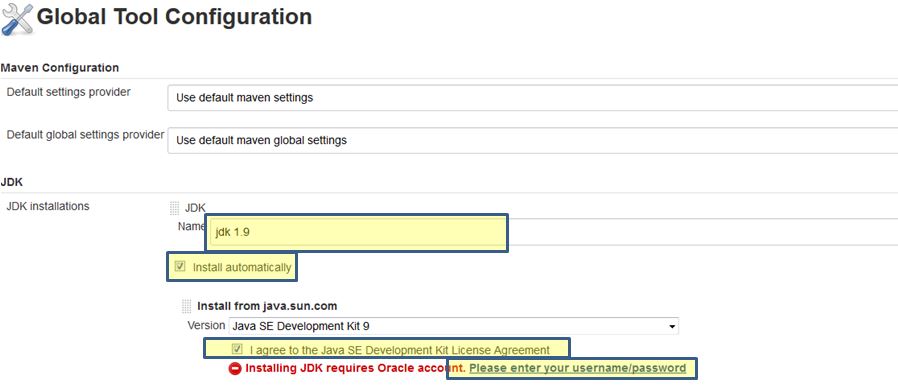
> maven 설치
mysql 명령어
- 버전 확인 :
- os command : mysql –version
- sql로 확인 : SELECT VERSION()
- Database 생성, 삭제
- 생성 : create database <database name>;
- 문자열 encoding 지정: create database <database name> default charset utf8;
- 삭제: drop database <database name>;
- 생성 : create database <database name>;
windows scheduler를 통한 jar 실행
- Test 환경
- OS : windows 7 ( professional )
- eclipse neon 3
- 순서
- jar file 만들기
- batch file 생성
– jar file이 실행되는 batch script 생성 - windows job scheduler를 통한 스케줄 생성.
- 실습
- jar file 만들기
- test application class 생성
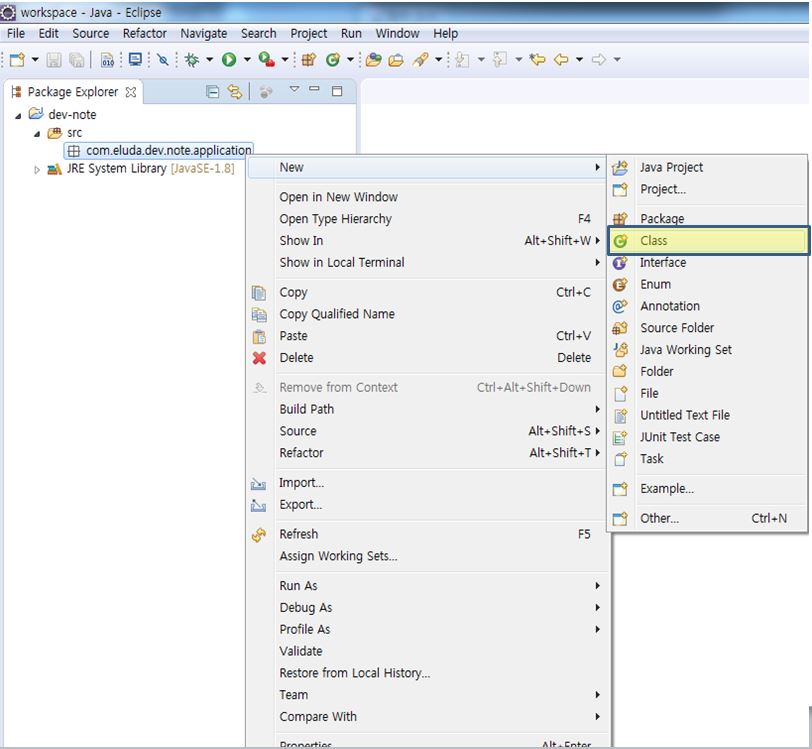
class 생성 – 1 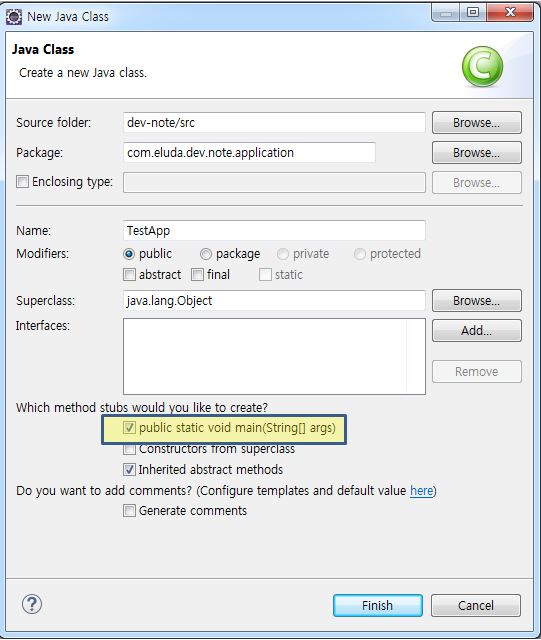
class 생성 – 2 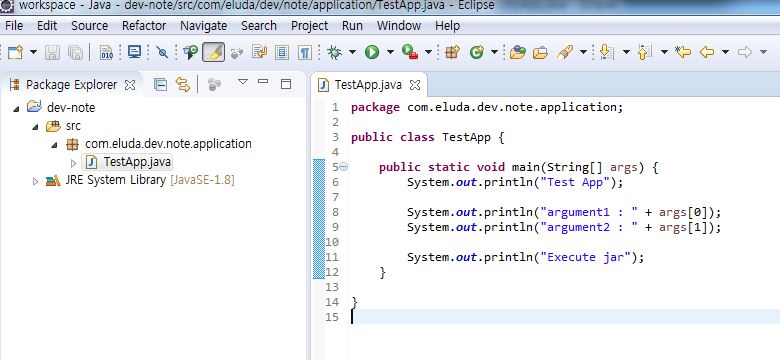
class 생성 – 3 package com.eluda.dev.note.application;
public class TestApp {
public static void main(String[] args) {
System.out.println(“Test App”);
System.out.println(“argument1 : ” + args[0]);
System.out.println(“argument2 : ” + args[1]);
System.out.println(“Execute jar”);
}
} - set application run configuration
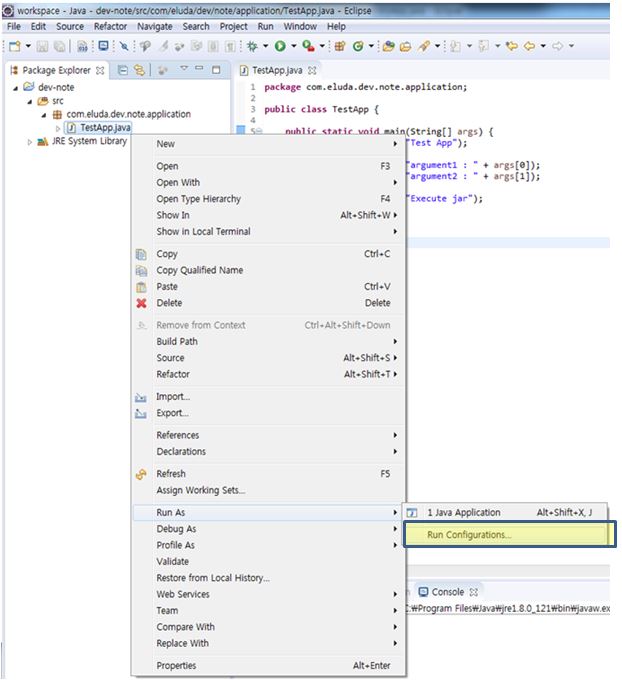
set java application run configuration – 1 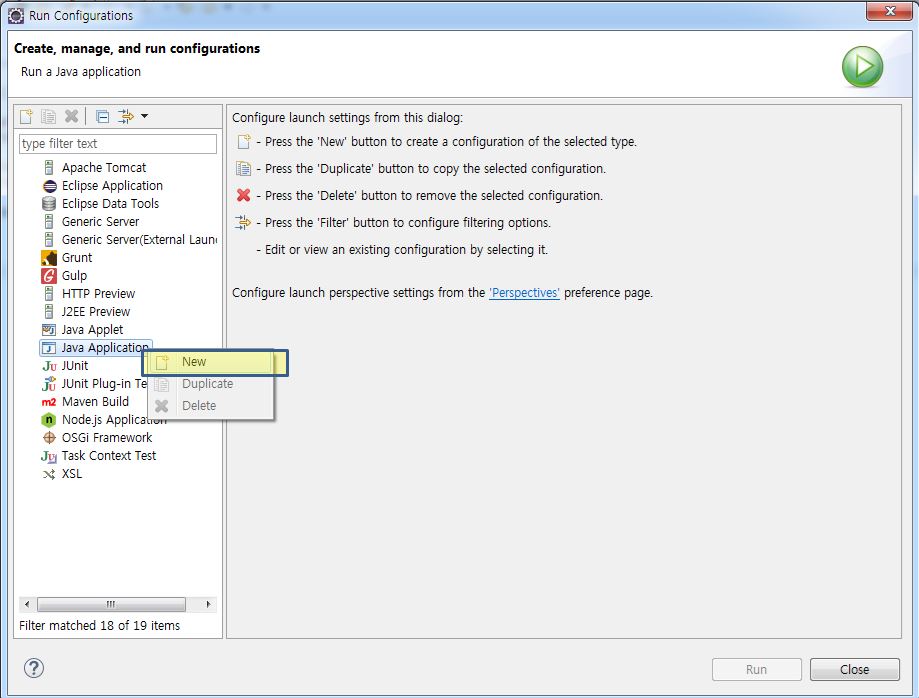
set java application run configuration – 2 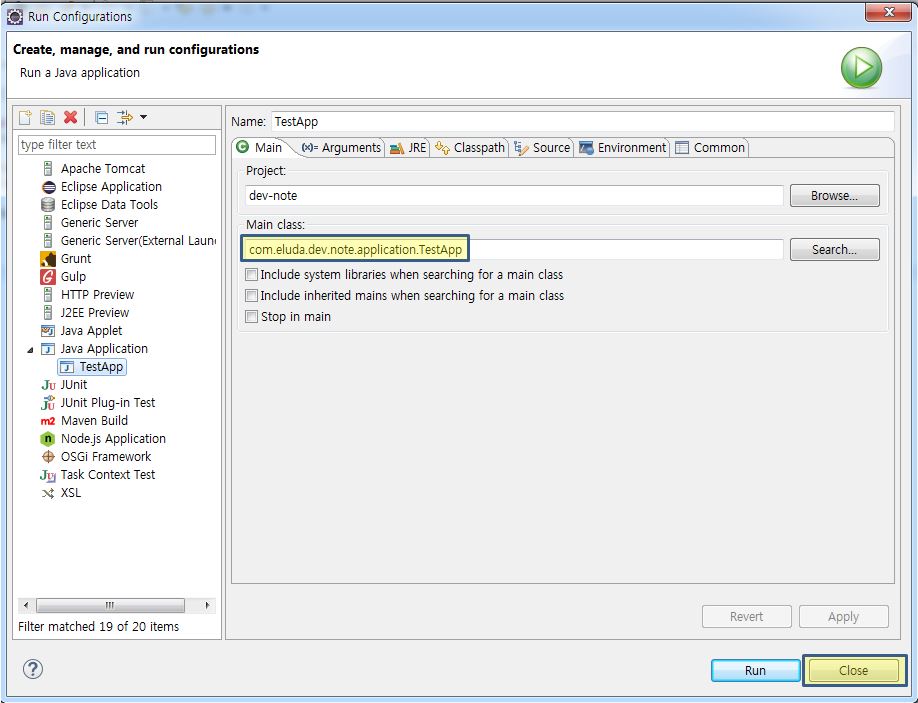
set java application run configuration – 3 - runnable jar 만들기
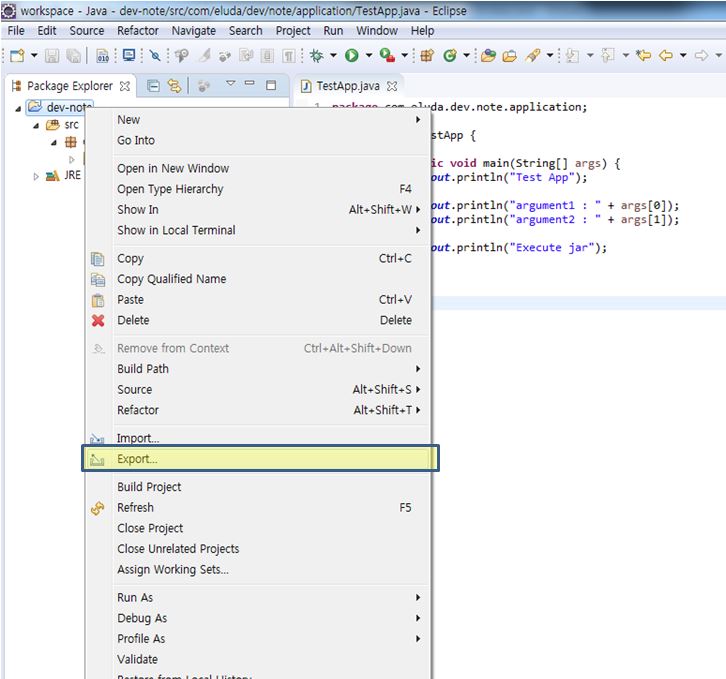
runnable jar 만들기 – 1 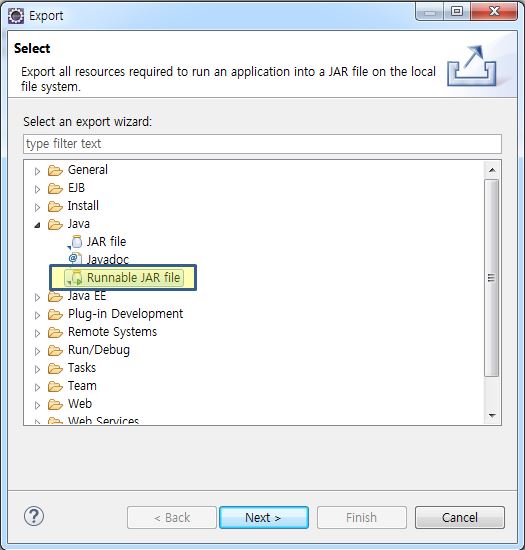
runnable jar 만들기 – 2 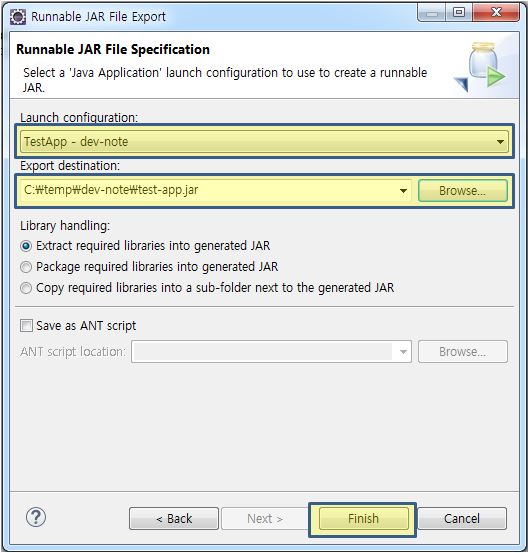
runnable jar 만들기 – 3 - 확인
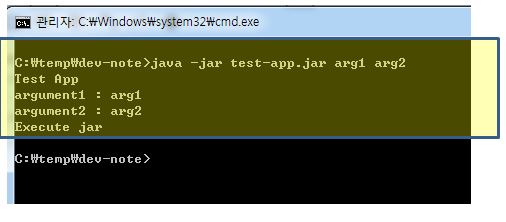
실행 확인
- test application class 생성
- batch file 생성
– jar가 실행 될수 있게 batch script를 만든다.
> windows-scheduler-jar-test.bat
@echo off
echo start
echo argument1 : %1
echo argument2 : %2
echo jar full path : %3
java -jar %3 %1 %2
echo end
exit - windows job scheduler를 통한 스케줄 생성.
– job scheduler 실행
> 제어판 > 시스템 및 보안 > 관리 도구 >> 작업 스케줄러
– job schedlue 생성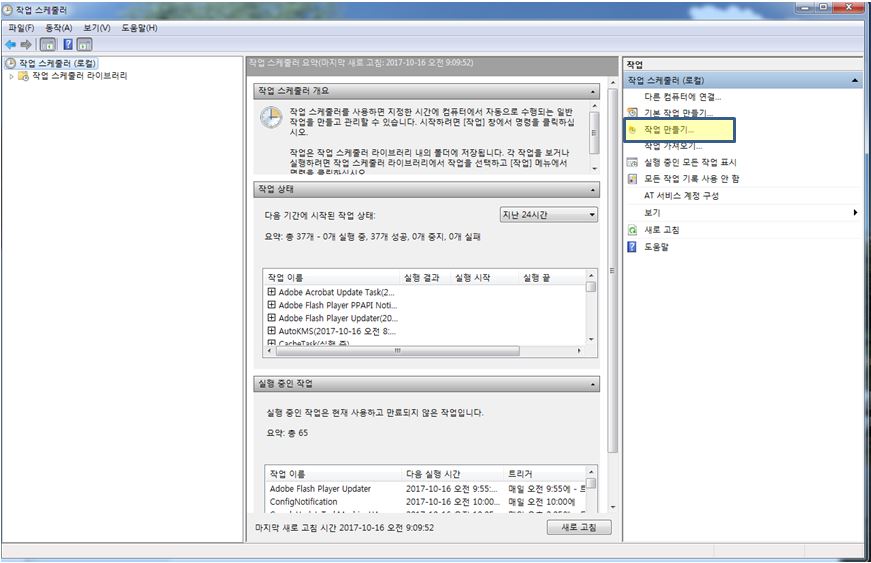
schedule 생성 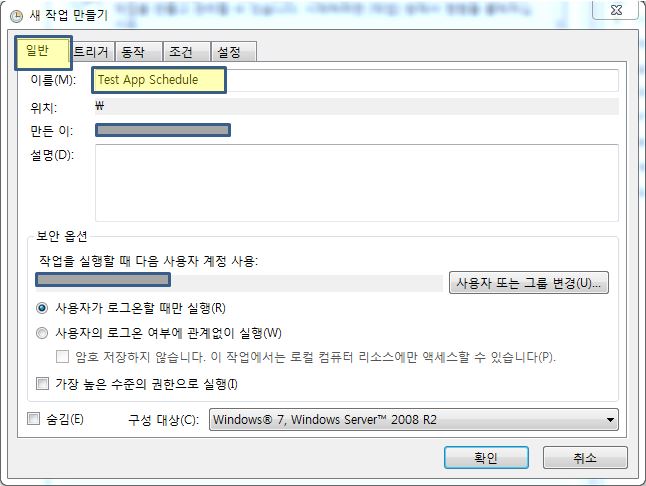
일반사항 설정 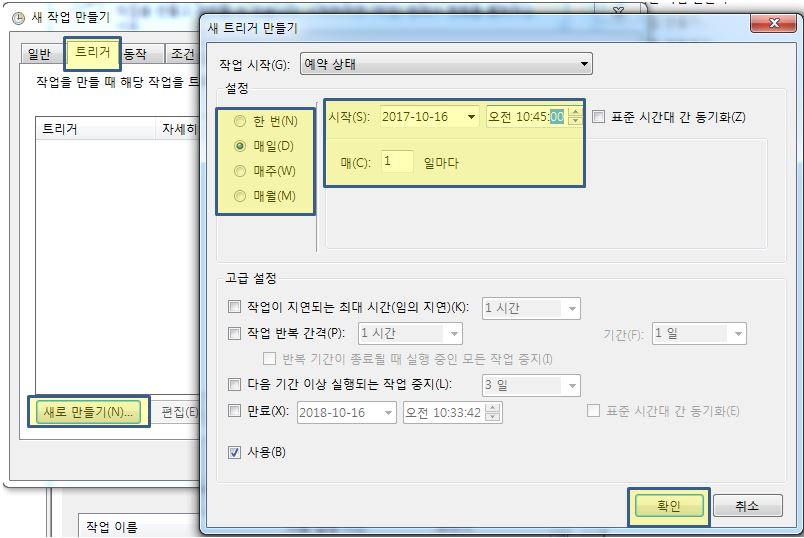
트리거 설정 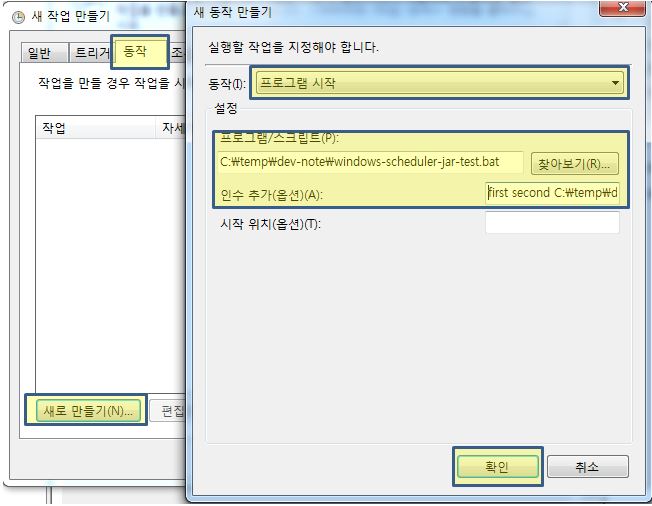
동작 설정 * 인수는 batch file 실행시 전달할 arguments로 공백으로 구분 : 예) first second C:\temp\dev-note\test-app.jar
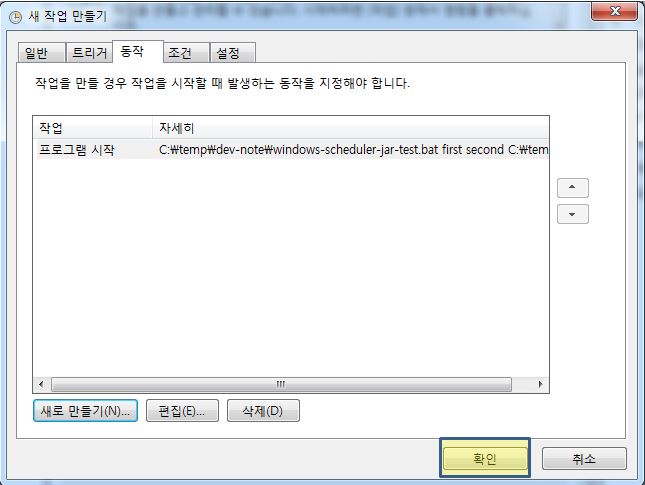
확인 버튼 클릭을 통해 생성 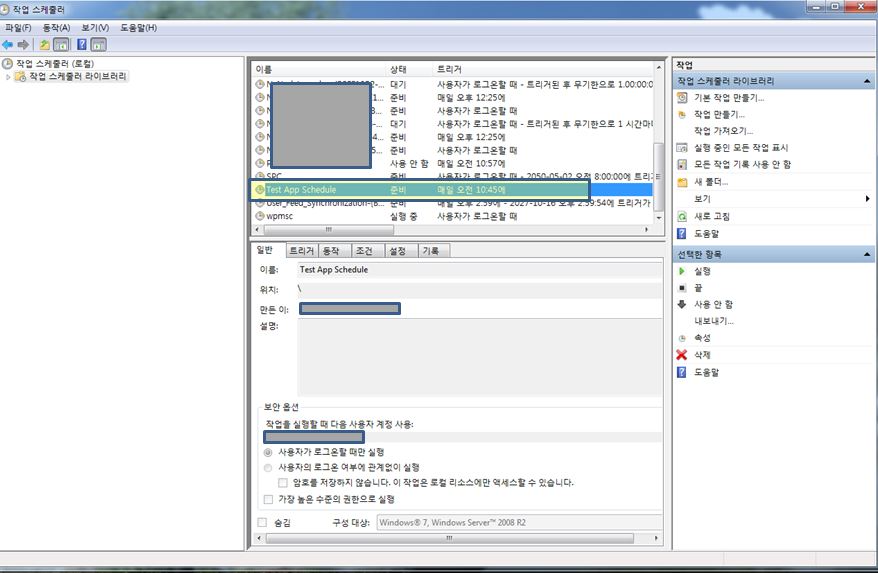
생성 확인
- jar file 만들기
Spark 설치 및 설정 ( openfire client )
[설치 환경]
OS : windows 7(Professional)
설치 버전 : 2.3.8
[download]
http://www.igniterealtime.org/downloads/download-landing.jsp?file=spark/spark_2_8_3.exe
[ 설치]
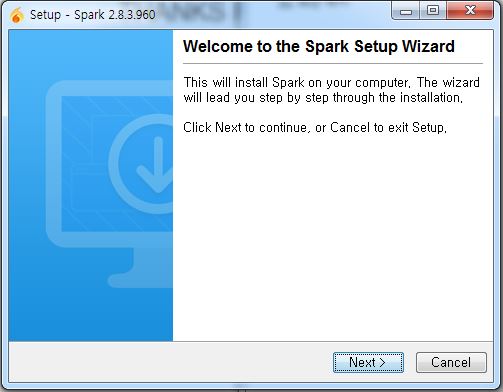
1. 설치 파일 실행
2. spark 설치
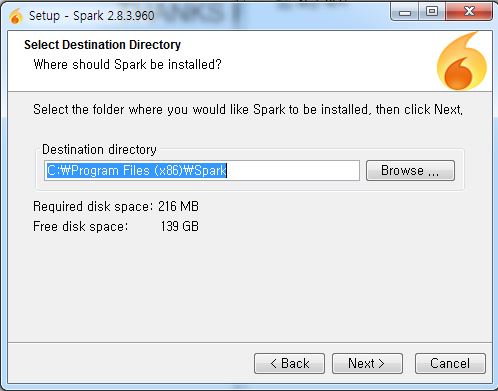
3. 설치 위치 설정
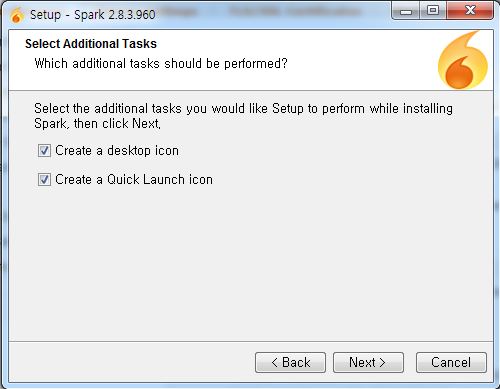
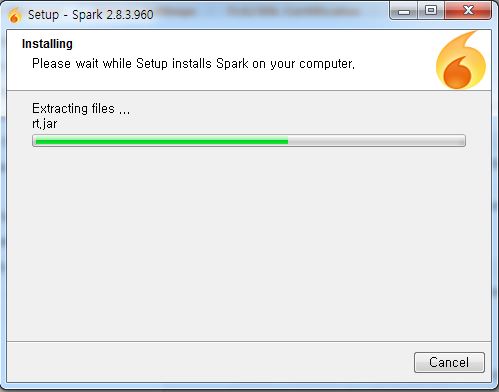
4. 설치 진행
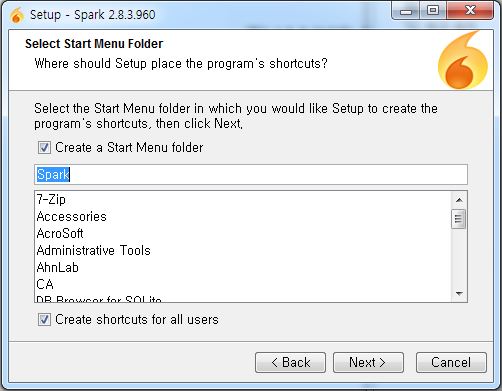 =>
=>
 =>
=>
5. 설치 완료

[ Spark 연결 설정 ]
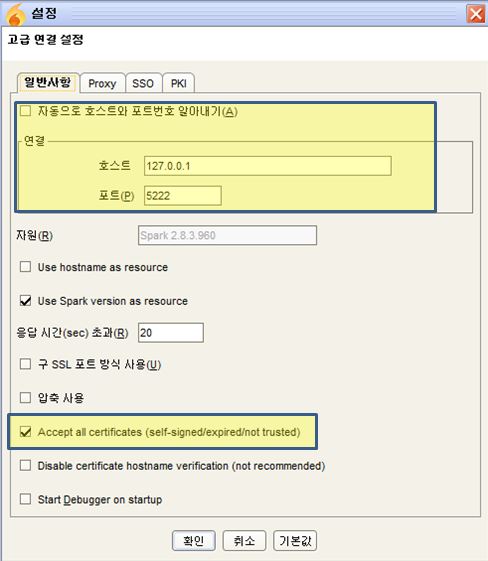
1. 기타 설정을 통해 서버 연결설정
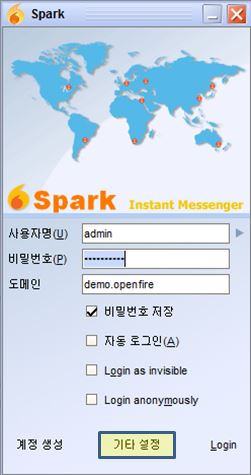
2. 서버 연결 설정
3. id/password 입력
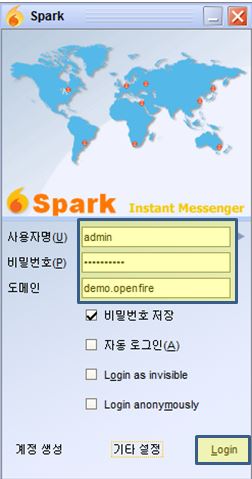
4. 확인
Openfire 서버 설치 및 설정 – Windows
[설치 환경]
OS : windows 7(Professional)
설치 버전 : 4.1.5
Database : mysql 5.7.19
[download]
http://www.igniterealtime.org/downloads/download-landing.jsp?file=openfire/openfire_4_1_5.exe
[설치전 준비]
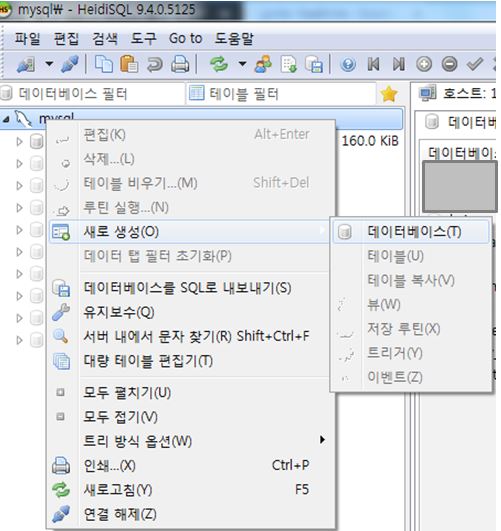
– 별도 database에설치시 database 생성
> HeidiSQL 사용.
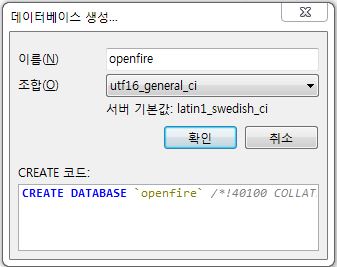
> command console을통해 mysql 접속후 명령어를 사용할 경우
>> mysql -u <사용자> -p
>> create database openfire;
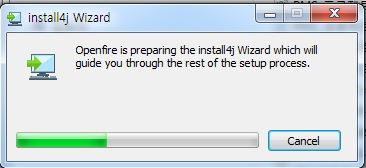
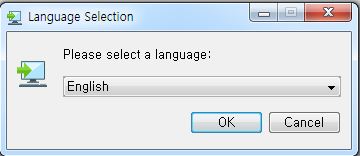
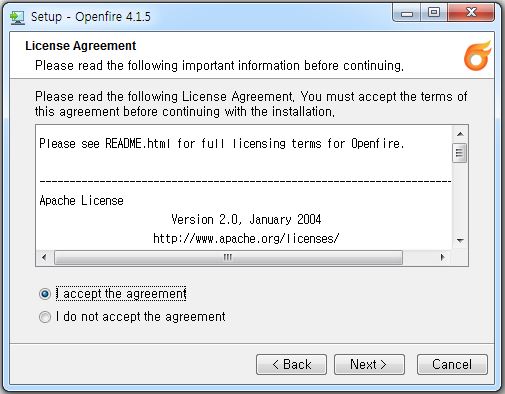
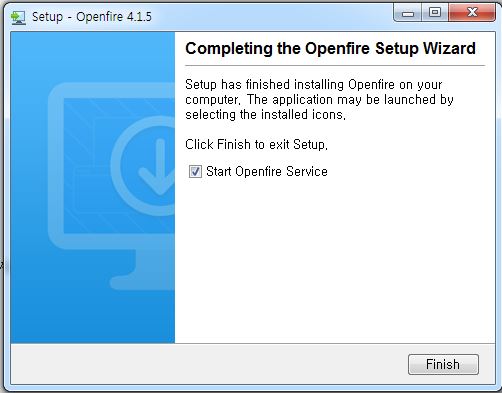
[ 설치단계 – 1 ]
1. 설치 파일 실행
2. 언어 선택 : English로 선택.
3. 설치진행

4. 라이선스동의
5. 설치위치설정
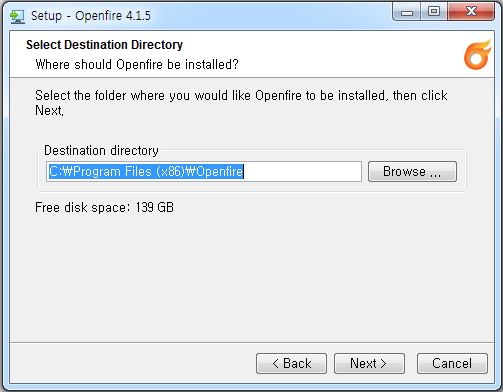
6. 설치 진행
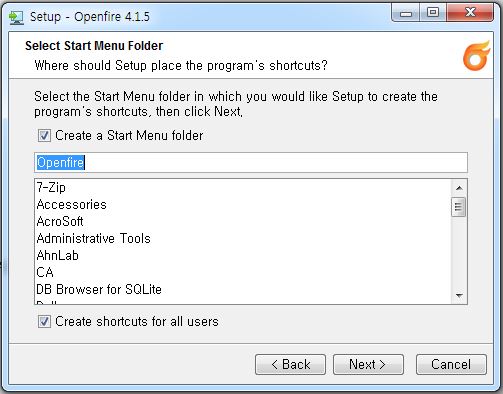
7. 파일 설치
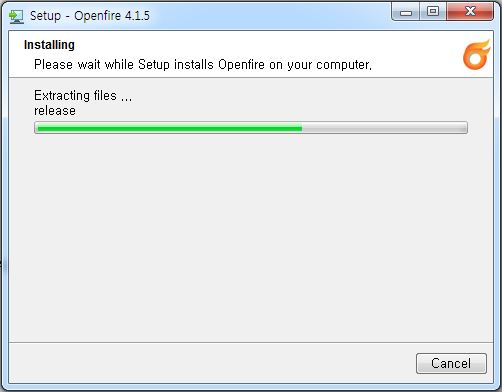
8. 설치완료
[ 설정 ]
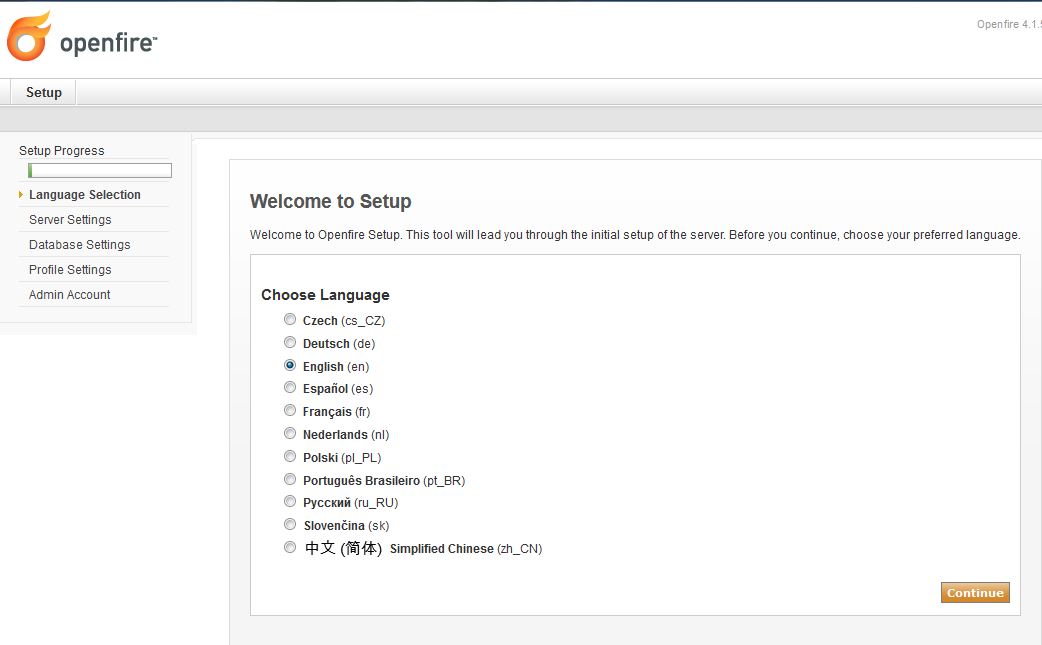
1. 언어 설정
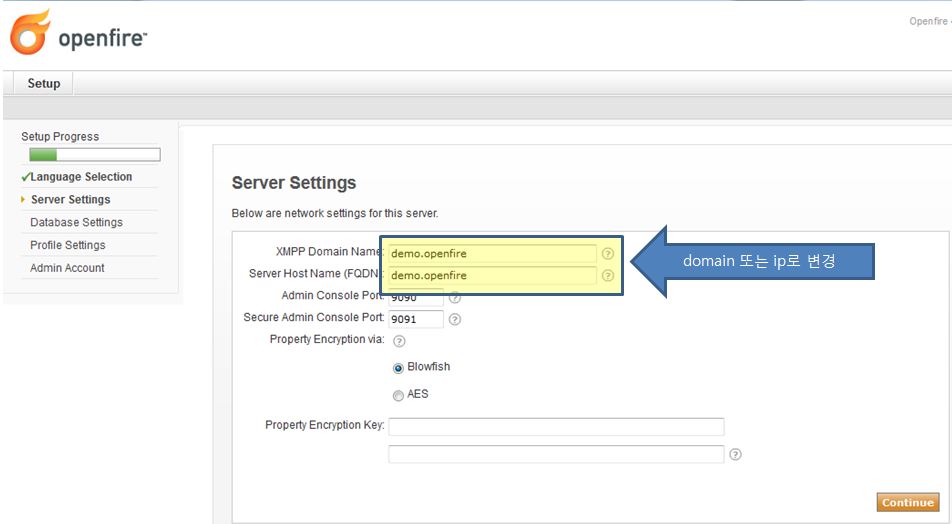
2. 도메인설정 ( ip로도설정 가능)
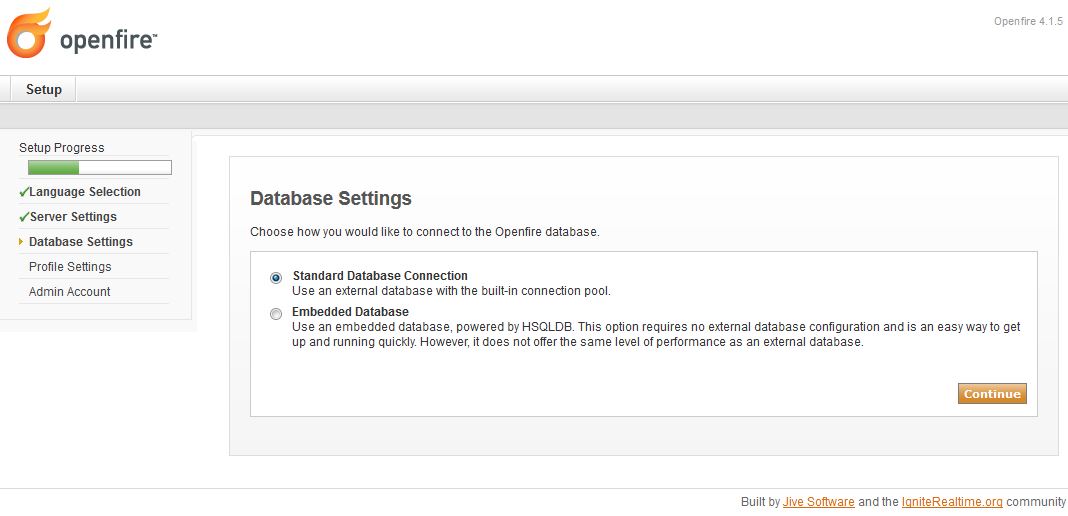
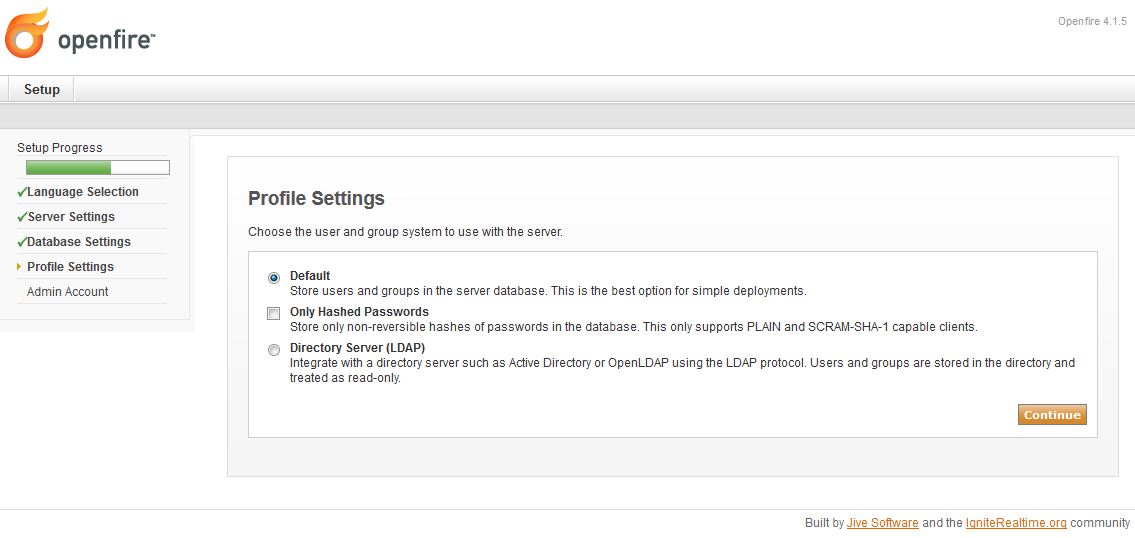
3. 설치 데이타베이스 연결 선택(자체 데이타 베이스, 별도 데이타 베이스)
4. 데이타베이스연결 설정
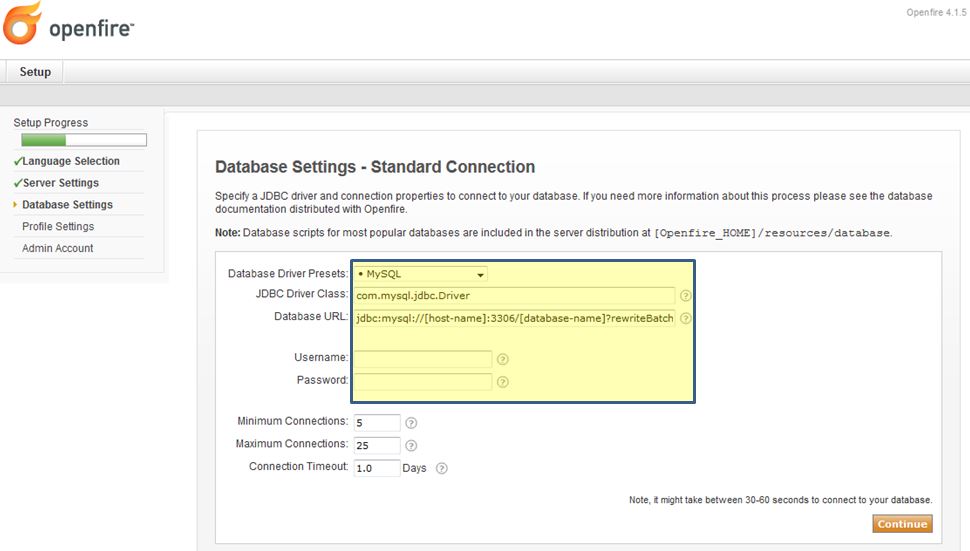
– Database Driver Presets : MySQL
– JDBC Driver Class : Database Driver Proesets 선택시 자동 선택
– Database URL : jdbc:mysql://<host name, ip>:<port>/<database-name>?rewriteBatchedStatements=true
– Username : database 접속 id
– Password : database 접속 password
5. database profile 선택
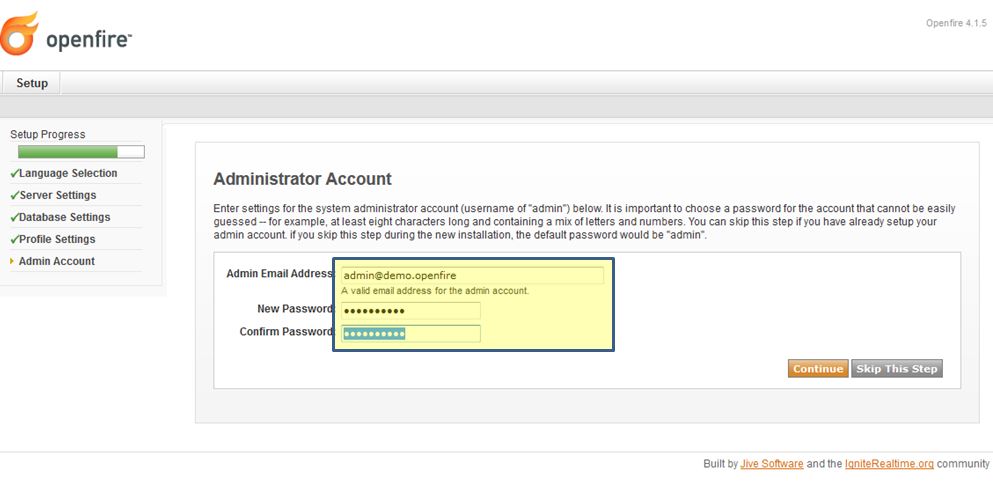
6. 관리자 설정
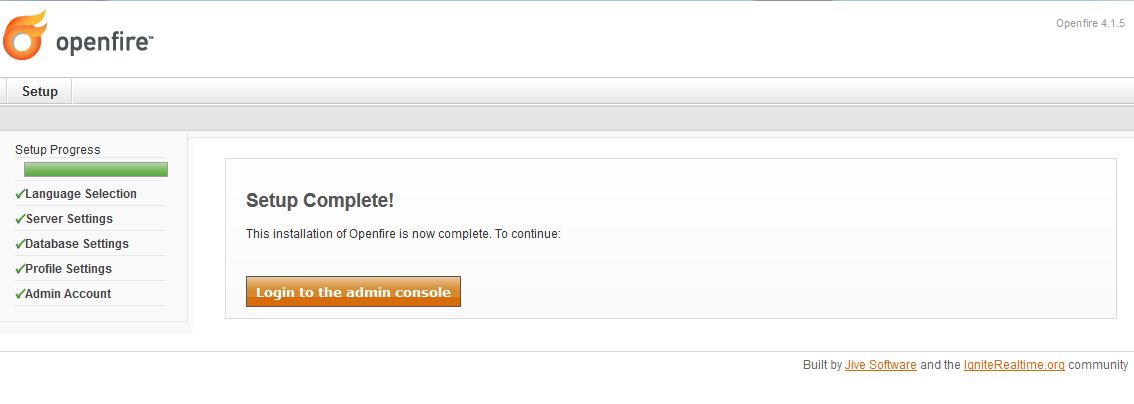
7. 설정 완료
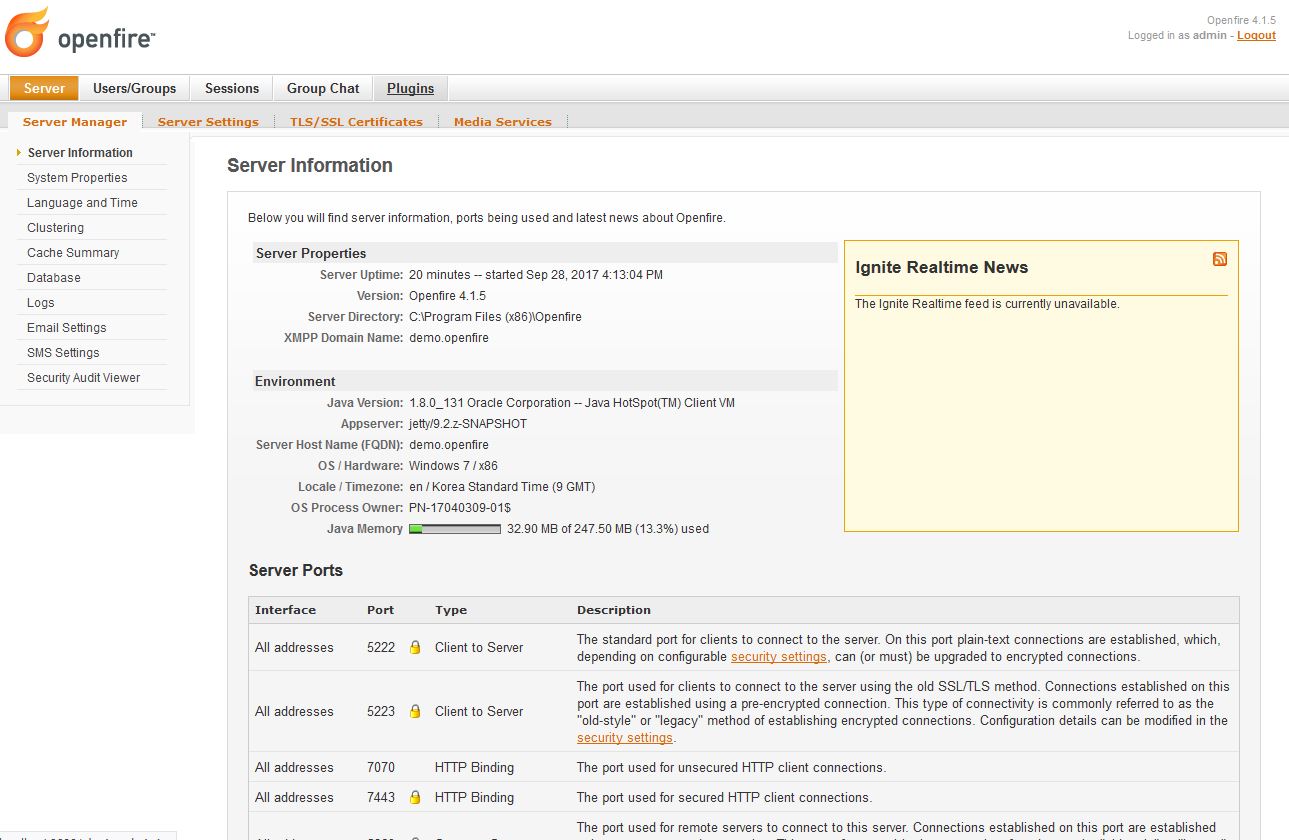
[ 설치 완료]
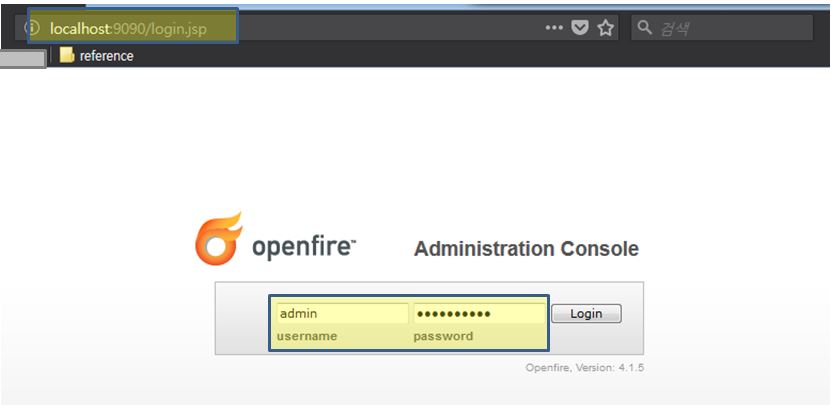
1. 관리자 화면 로그인
2. 관리자화면